Merry Christmas!
A new unique Christmas Card is born!
This year, as earlier years, we have made a PCB card with a MCU and shiny LEDs to assist with the holiday spirit creation =)
Appearance
As you probably have understood by looking at our earlier blog post:
Each year they have a different look
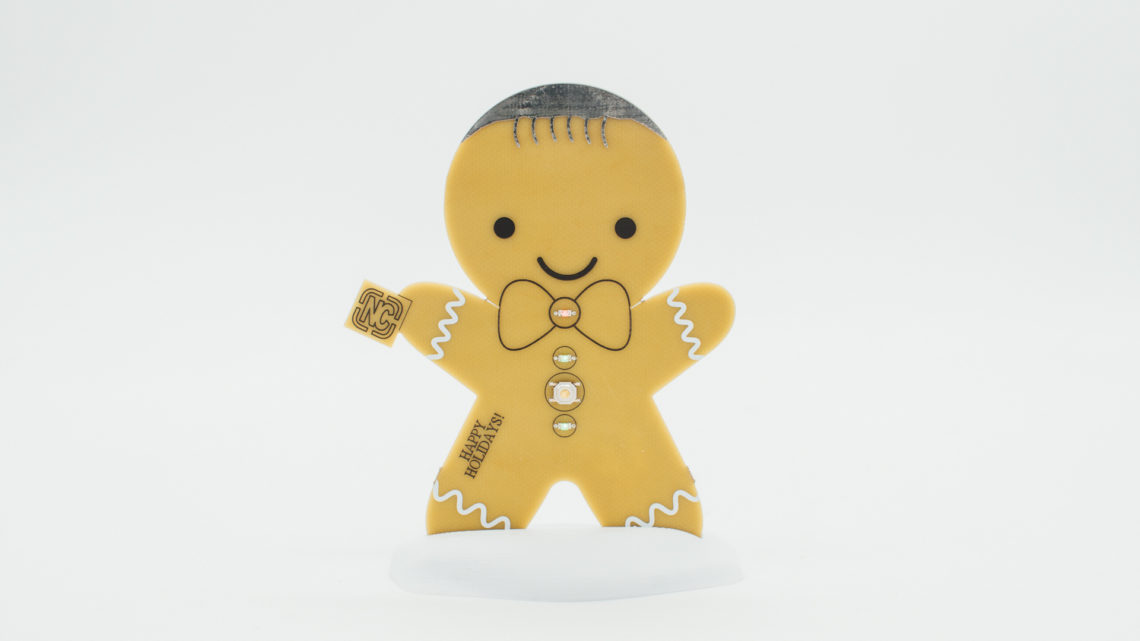
This year we created a Gingerbread-girl (another member of the Gingerbreadfamily?).
The body pure FR4, while the “hair” is copper, the white details are solder-mask and the black colors are silk screen.
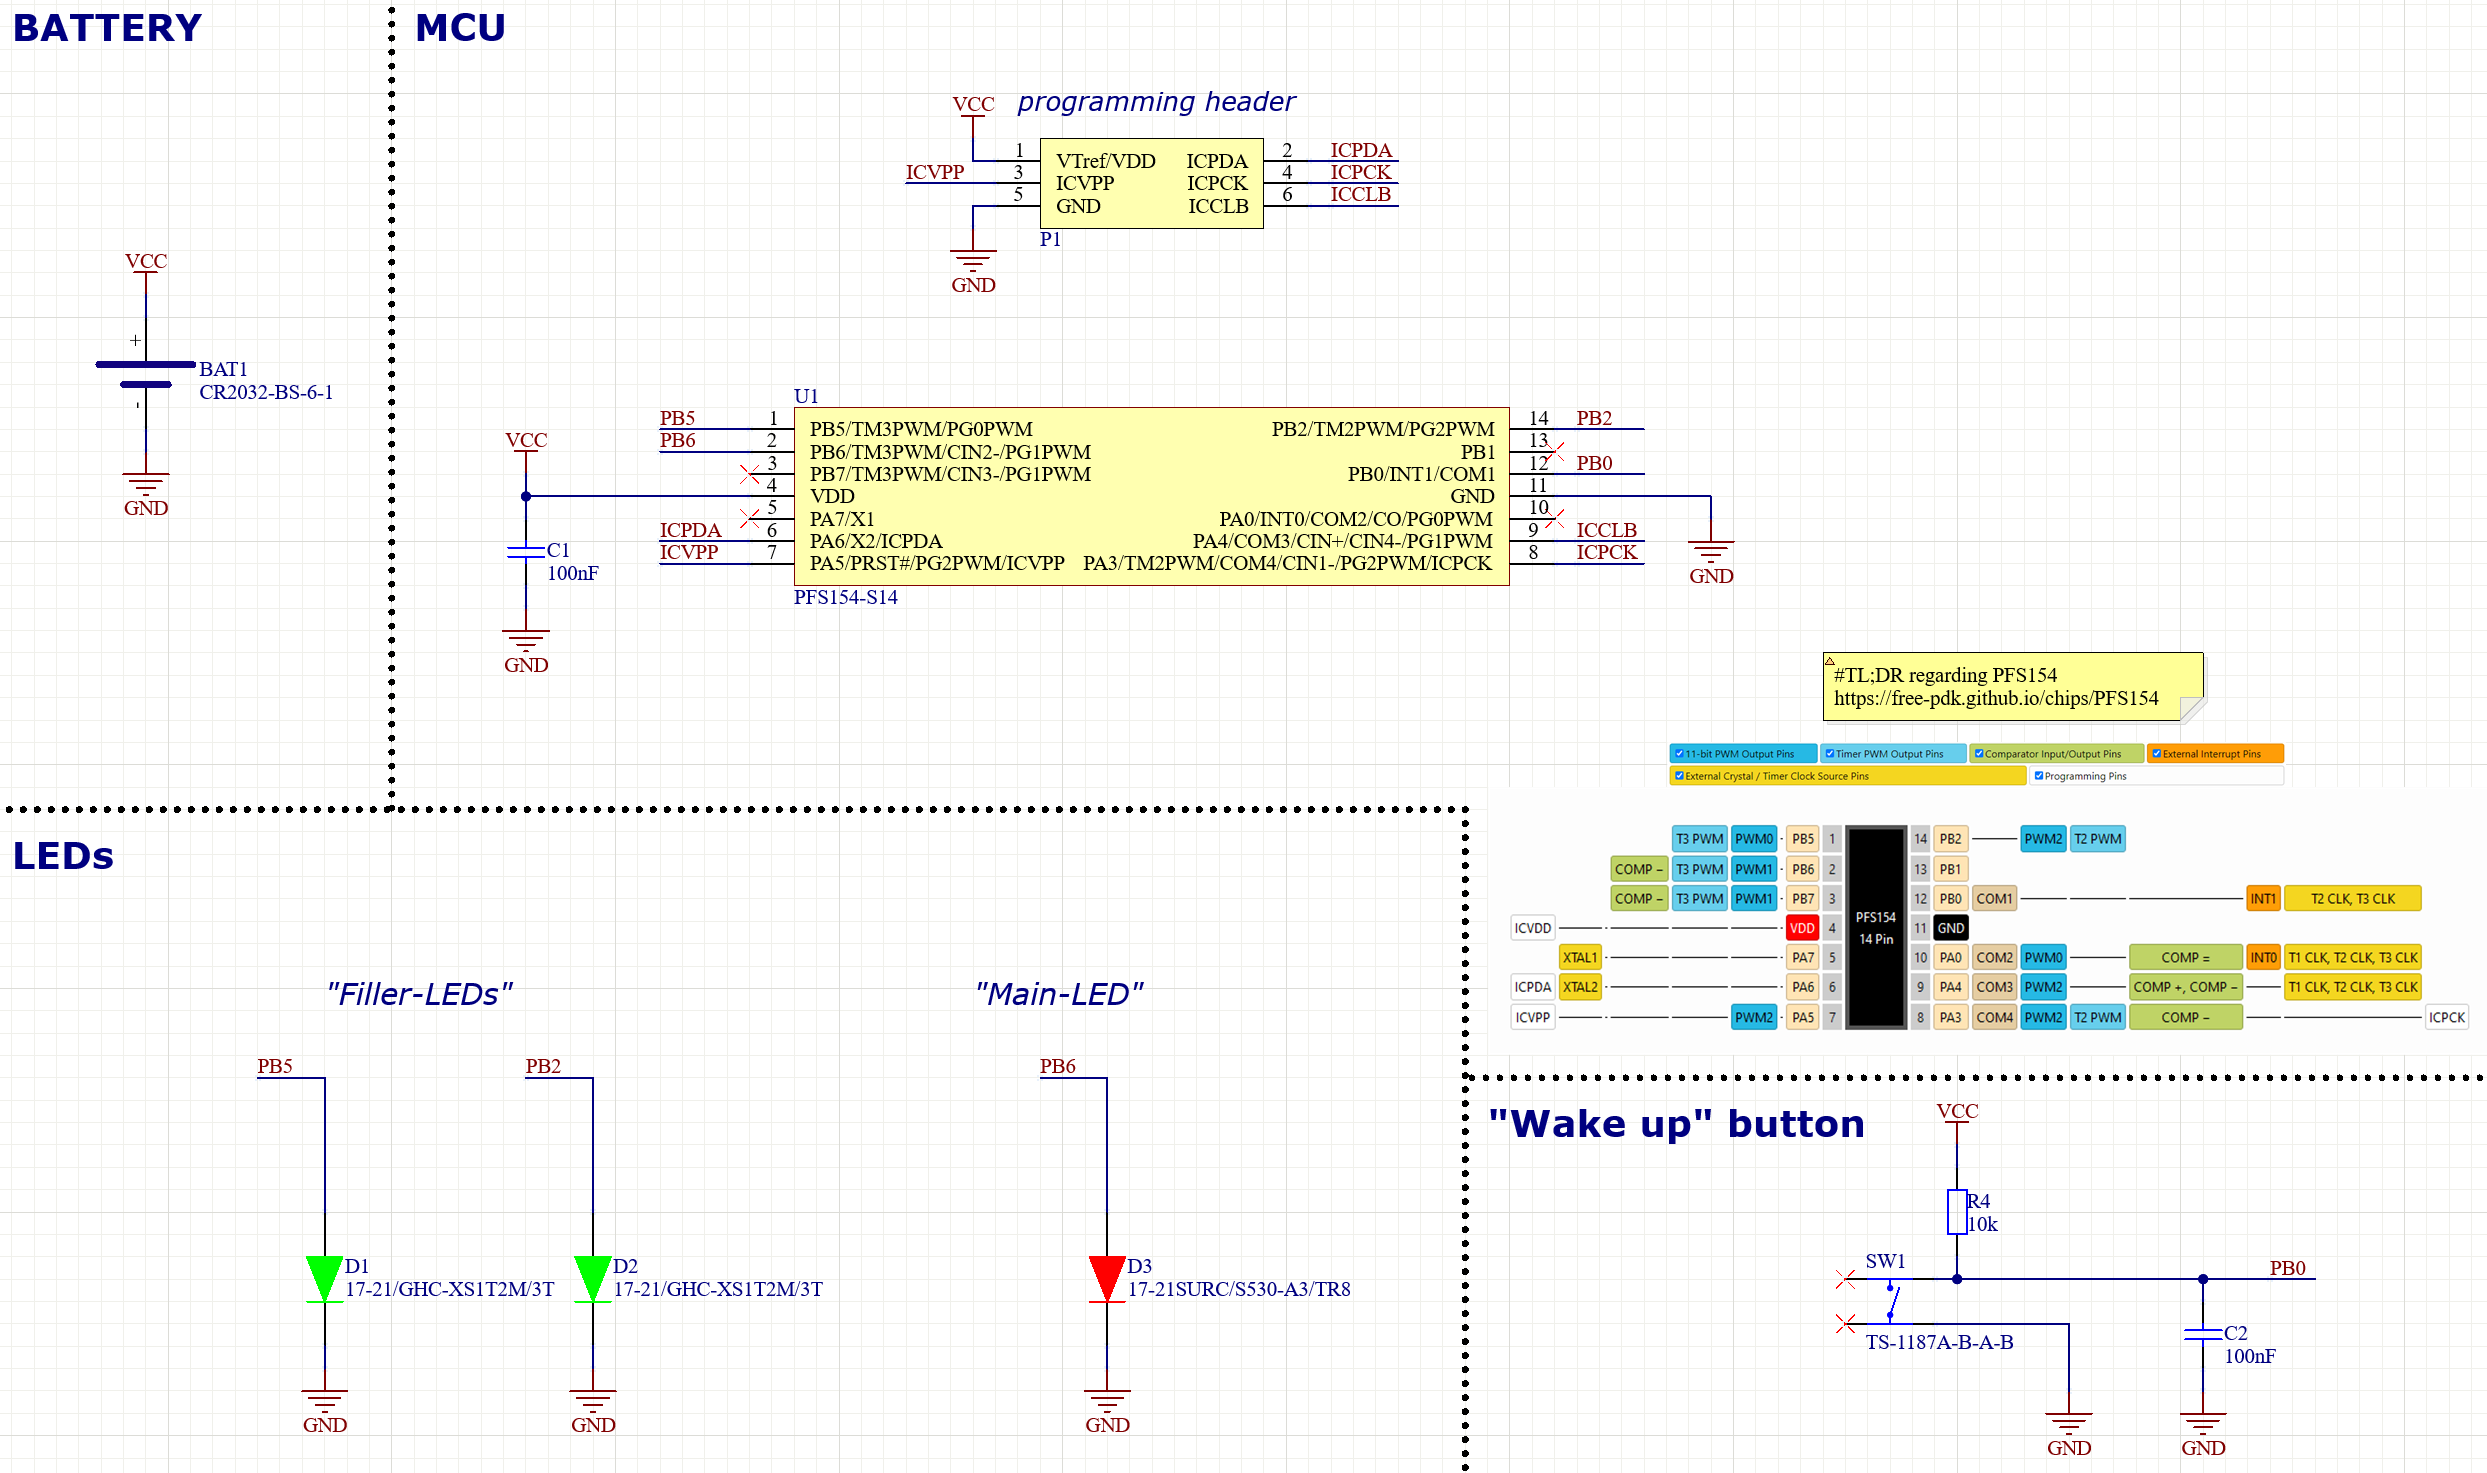
The circuit
With only 128 bytes RAM the “powerhouse” (not really:P) Padauk PFS154 was used again.
It is a rather fun challenge to design something simple like this, when a typical MCU-datasheet in one of our regular system designs are 500 pages + long.
Read more about how “light” this MCU is in the posts located here!
New changes
The circuit is pretty similar to last years, but some changes are implemented:
- We have removed several optional led current limiting resistor.
- We have added a filtering capacitor on the main button ([C2]).
What about low power?
As last year, it uses only ~0,18 uA in OFF state this year as well!
(Behavior adjustment based on battery voltage can be read more about here)
How to program it?
The Christmas Card can handle the programming voltages, but the battery cannot, so the battery should not be present when programming happens!
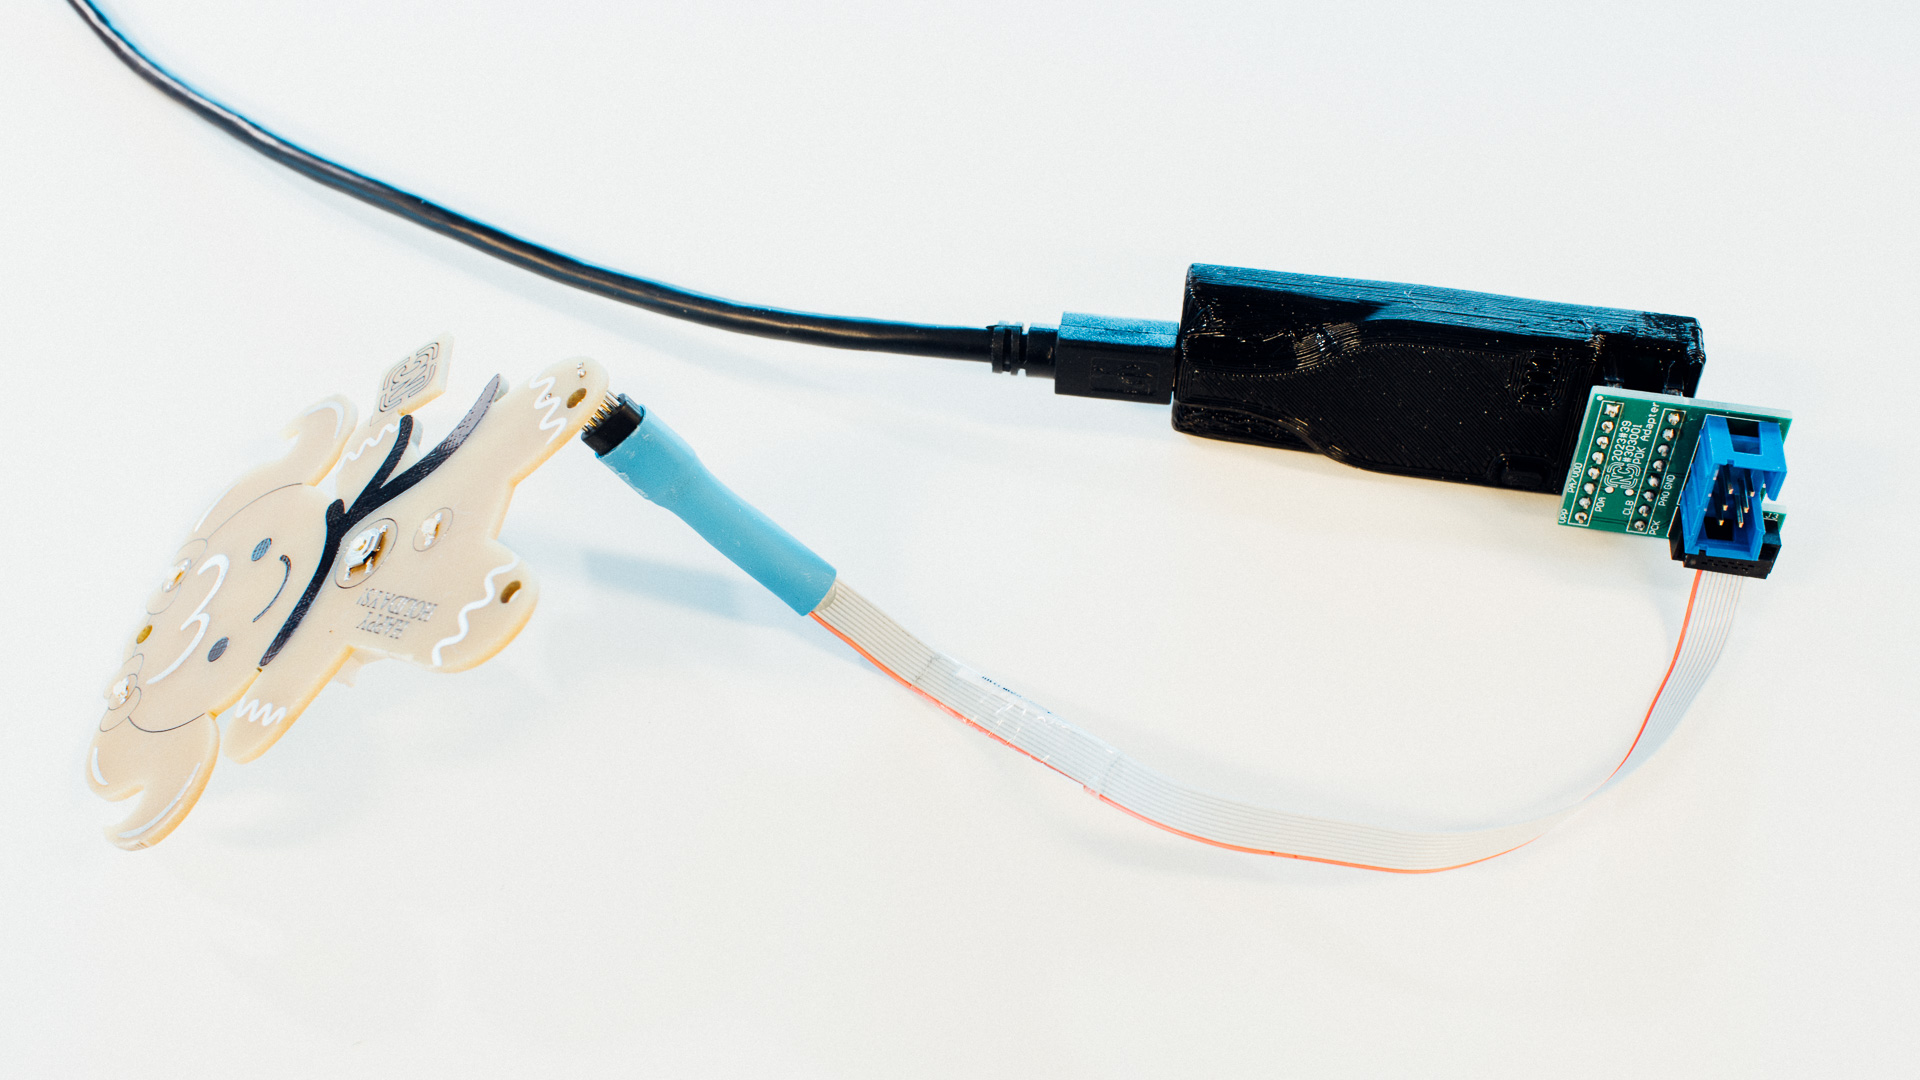
We programmed it using the Easy PDK programmer, and we wrote the firmware in C and compiled it using the Free PDK toolchain (docs: Easy PDK Programmer (Software & Hardware)).
We made a Tag-Connect compatible programming header, and used a Tag-Connect (TC2030-IDC-NL) + an adapter for fast and easy connection.

You can download the compiled firmware on the other side of this URL.
(Remember that this work is licensed under a Creative Commons Attribution-NonCommercial-ShareAlike 4.0 International License.)
After initial setup, we got the following output when programming:
λ make all program run
---------- Segments ----------
.  .ABS.                            00000000    00000000 =           0. bytes (ABS,CON)
.  .ABS.                            00000000    00000000 =           0. bytes (ABS,CON)
FUSE4                               00000000    00000002 =           2. bytes (ABS,CON)
HEADER1                             00000000    00000002 =           2. bytes (ABS,CON)
HEADER3                             00000000    00000010 =          16. bytes (ABS,CON)
PREG2                               00000000    00000002 =           2. bytes (ABS,CON)
RSEG0                               00000000    00000008 =           8. bytes (ABS,CON)
DATA                                00000002    00000024 =          36. bytes (REL,CON)
HOME                                00000022    00000002 =           2. bytes (REL,CON)
GSINIT                              00000024    00000042 =          66. bytes (REL,CON)
SSEG                                00000026    00000001 =           1. bytes (REL,CON)
GSFINAL                             00000066    00000002 =           2. bytes (REL,CON)
CODE                                00000068    000006BC =        1724. bytes (REL,CON)
CONST                               00000724    00000022 =          34. bytes (REL,CON)
------------------------------
Size of NC_christmas_card_PFS154.bin: 4096 bytes
EASYPDKPROG/easypdkprog -n PFS154 write .output/NC_christmas_card_PFS154.ihx
Erasing IC... done.
Writing IC (2047 words)... done.
Calibrating IC
* ILRC SYSCLK=54400Hz @ 3.00V ... calibration result: 55069Hz (0x50)  done.
Setting of security fuse disabled. Use '--allowsecfuse' to set security fuse.
Writing IC Fuse... (0x30FD) done.
EASYPDKPROG/easypdkprog -r 3.5 start
Running IC (3.50V)... IC started, press [Esc] to stop.
The Stand
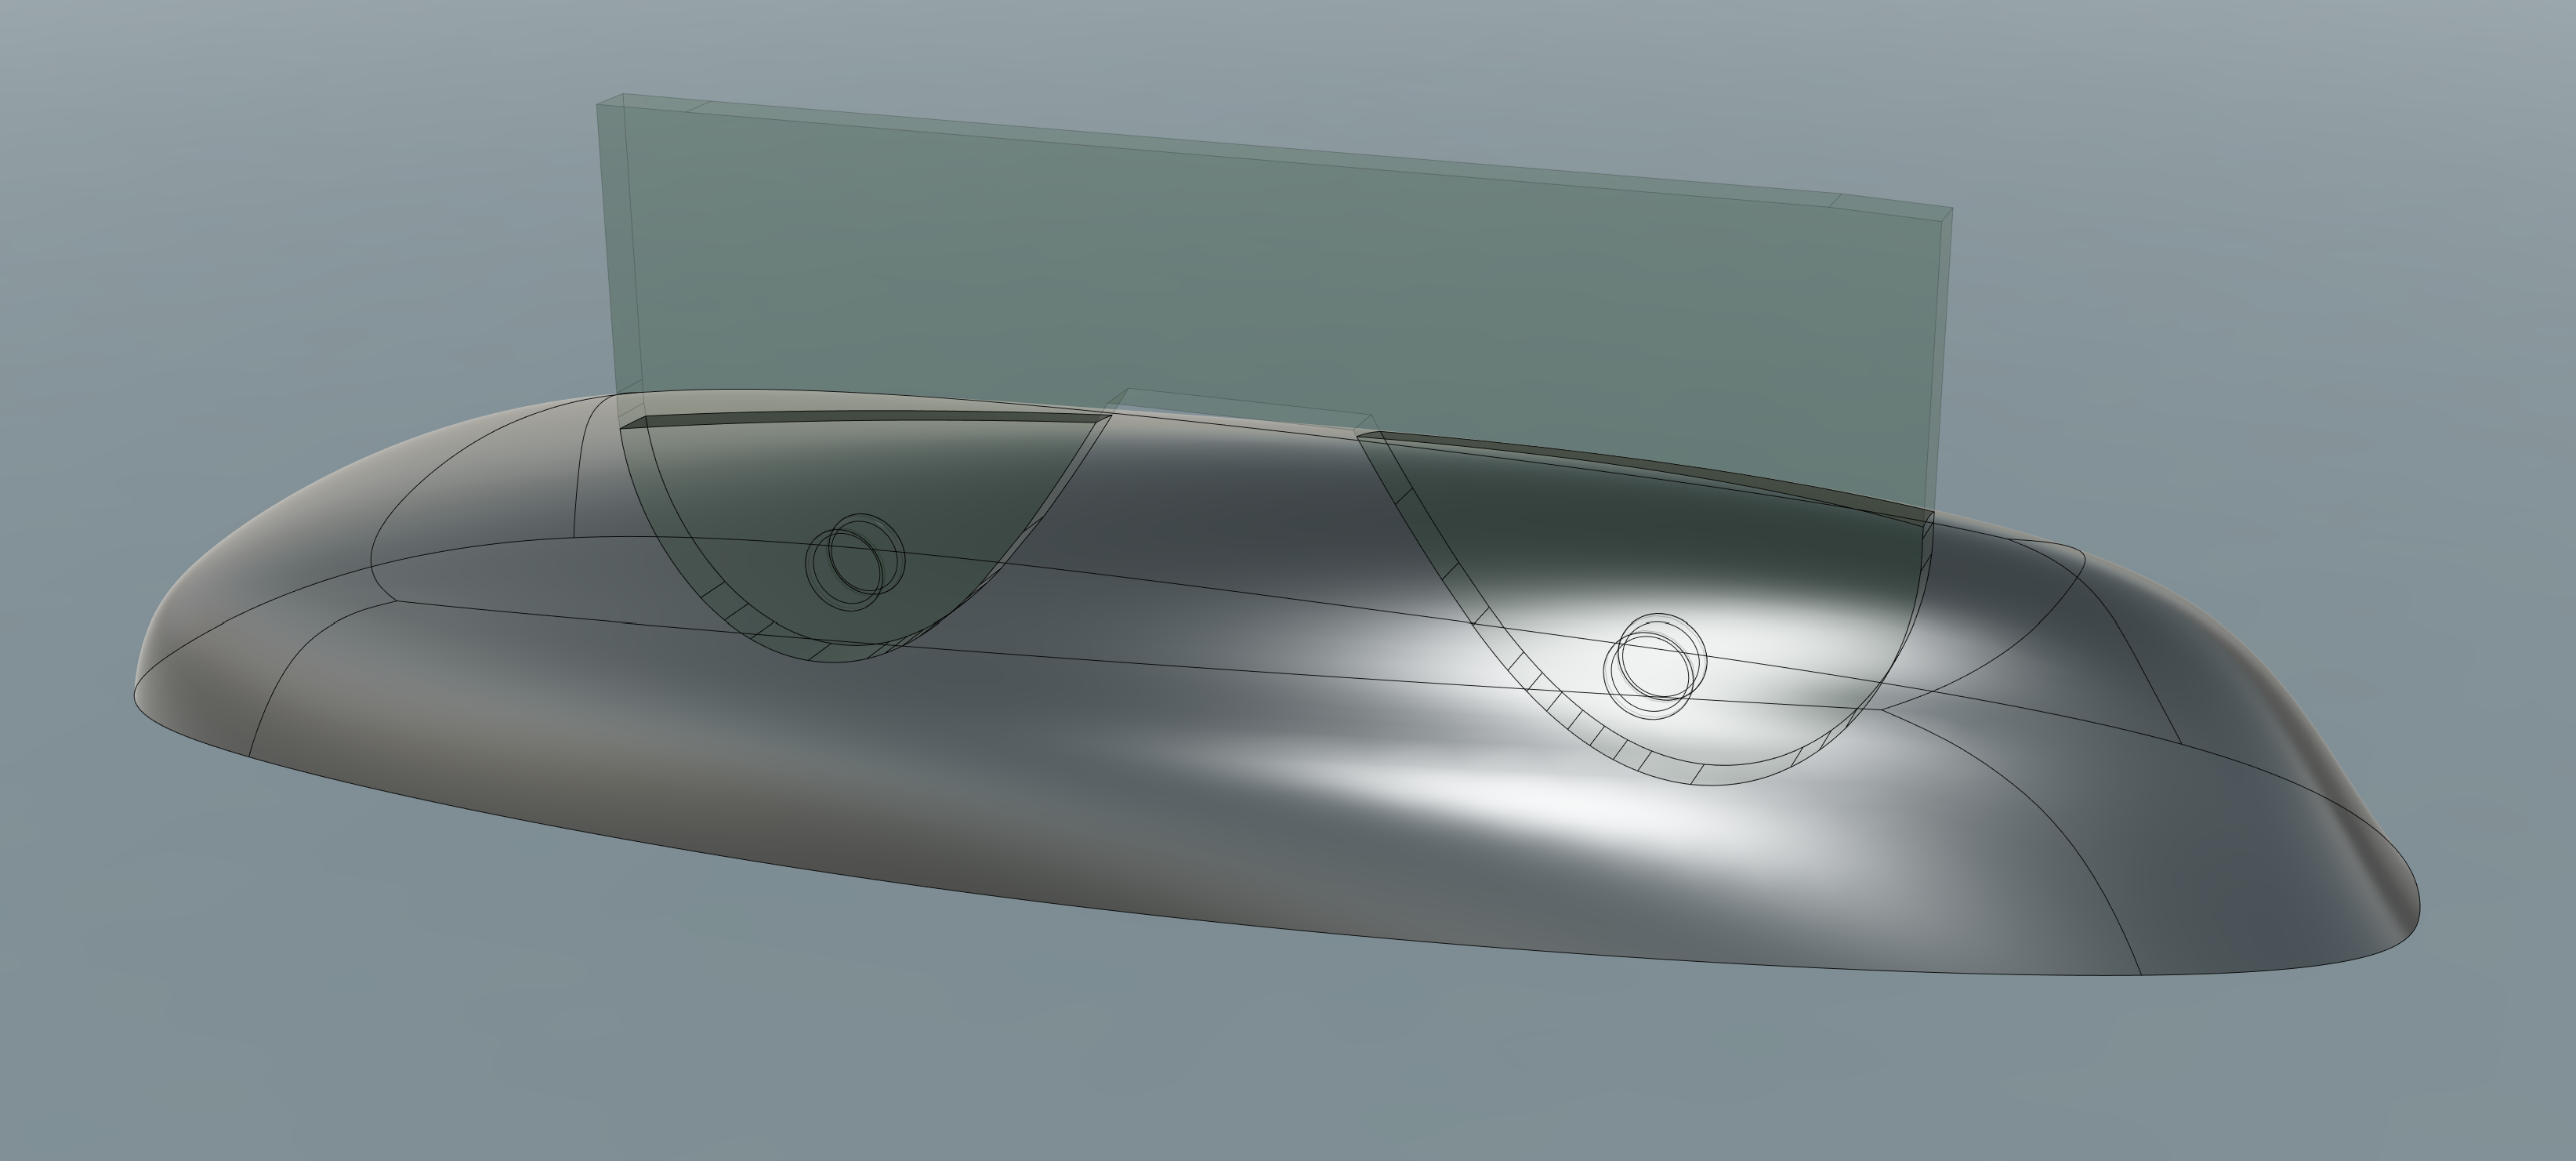
We exported a 3D-model of the Christmas card from the circuit design software we used, and after modeling a “random” mound we used the exported file to “remove” a press-fit-slot for the PCB:


The result was 3D-printed in-house:


