Christmas is approaching fast and every year we like to get creative with our Christmas cards to Norwegian Creations’ clients, partners, friends and family.
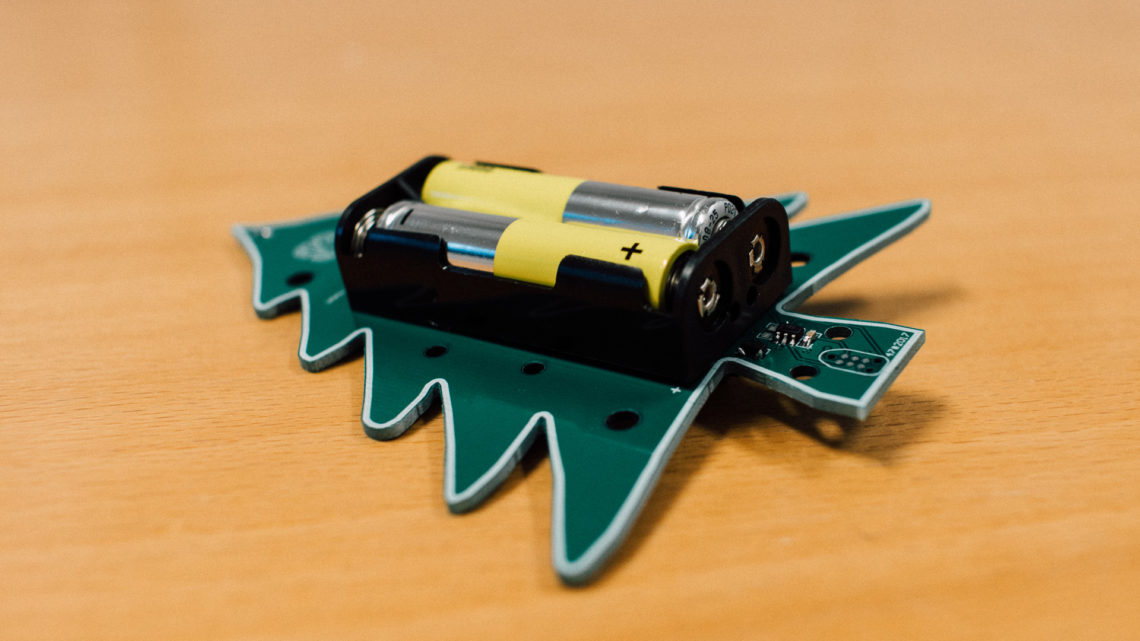
This year we decided to do something fresh and physical with our Christmas card routine. A quick brainstorm session culminated in a Christmas tree-shaped PCB with an LED in the top, an ATtiny10 microcontroller, a switch and a 3D printed stand.
Schematics
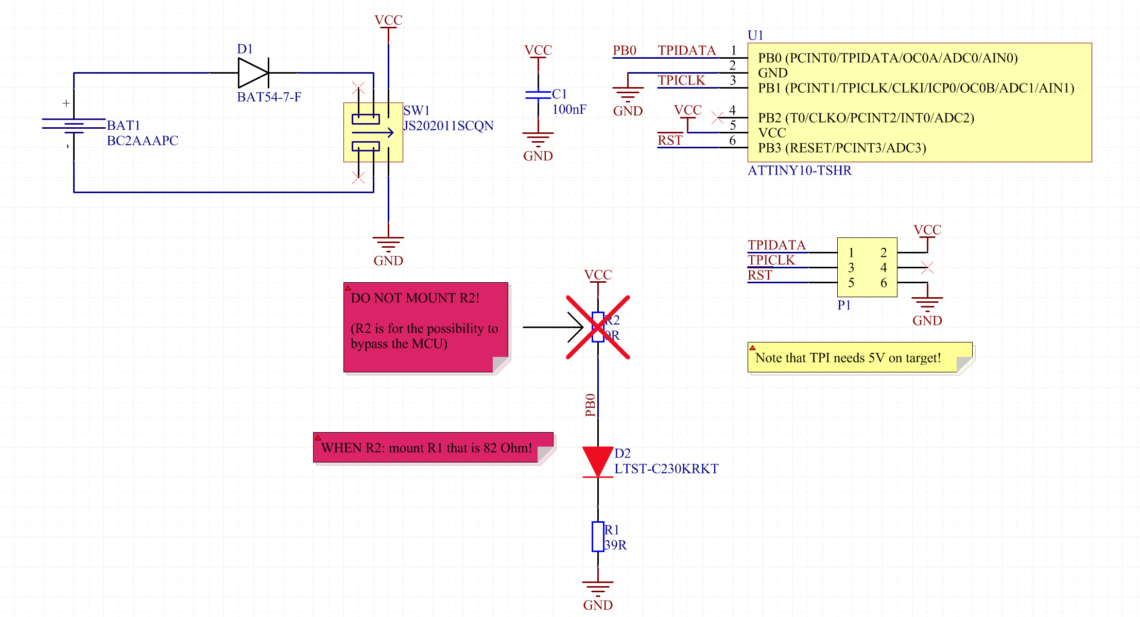
As you can see in the schematics below, the circuitry doesn’t get much simpler than this.

Code
The (non-optimized) code on the ATtiny isn’t much more complex.
#include <avr/io.h>

// define CPU speed - actual speed is set using CLKPSR in main()
#define F_CPU 8000000UL

#include <util/delay.h>

#define LED_MAX 500
#define LED_MIN 100
#define LEDPIN PINB0
#define LED_PWR OCR0A

int main(void){
	// set start led power to 0
	LED_PWR = 0;

	// Set CPU speed by setting clock prescaslar:
	// CCP register must first be written with the correct signature - 0xD8
	CCP = 0xD8;

	//  CLKPS[3:0] sets the clock division factor
	CLKPSR = 0; // 0000 (1)

	// 10-bit PWM on OC0A (PB0), non-inverting mode
	TCCR0A = 2<<COM0A0 | 3<<WGM00;

	// Divide clock by 1
	TCCR0B = 0<<WGM02 | 1<<CS00;

	// LED out (PB0)
	DDRB |= (1<<LEDPIN);

	// Smooth turn on
	for(uint16_t i = 0 ; i <= LED_MAX ; i++){
		LED_PWR = i;
		_delay_ms(1);
	}

	while (1){
		// Slow breath

		// DOWN
		for(uint16_t i = LED_MAX ; i >= LED_MIN ; i--){
			LED_PWR = i;
			_delay_ms(5);
		}

		_delay_ms(100);

		// UP
		for(uint16_t i = LED_MIN ; i <= LED_MAX ; i++){
			LED_PWR = i;
			_delay_ms(5);
		}
	}
}
Stand
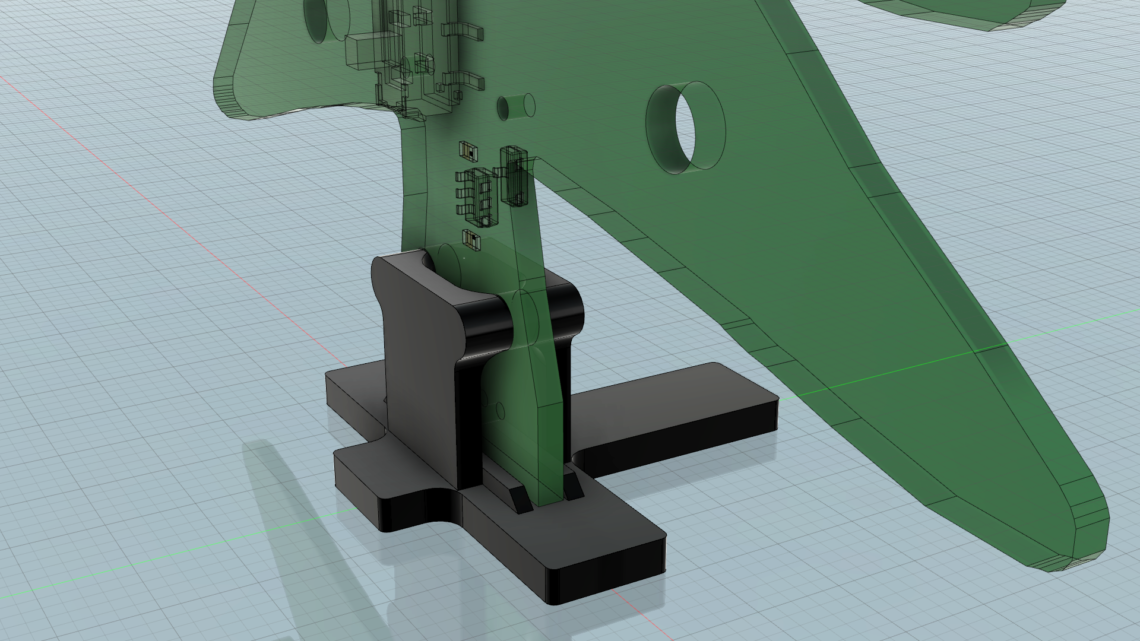
The stand was designed such that it will snap into place via two holes in the PCB by using the tension in the plastic. It is also asymmetrically modelled to compensate for the weight of the batteries on the backside of the PCB.

The Result
We’re really happy with how this turned out, and have already started thinking about what we’ll have to do next year to top this.


Merry Christmas and a happy new year to all our blog readers!


