There are many ways to make music. You have the traditional studio and live recordings to sequencing on Gameboy and everything in between.
In this blogpost we’re going to look at how to use your own computer to make music by utilizing MIDI programming. We will not go into musical theory or specific synthesizer topics in this post, but we’ll rather look at the general signal and workflow.
The last 15 or so videos on our Videos page (as of this time) contains music made the way described throughout this blogpost.
Overview
Let’s first look at the basic terminologies.
DAW
When you’re going to make music by programming MIDI you’ll need a DAW. DAW stands for Digital Audio Workstation and is the primary software you’re using when making or recording music. You might’ve heard of some of these popular DAWs: ProTools, Cubase, Logic Pro, FL Studio and Ableton Live. We will take a bit of a closer at the author’s weapon of choice: REAPER.
You also typically use DAWs to edit and record audio, not just MIDI.
MIDI
MIDI stands for Musical Instrument Digital Interface and is a technical standard encompassing both a protocol, digital interface and connectors. Among many other things, MIDI allows you to control digital instruments (e.g. synthesizers) using a wide variety of controllers (e.g. keyboards). Since it’s a communication protocol like any other, MIDI can also be used to control many non-music related devices.
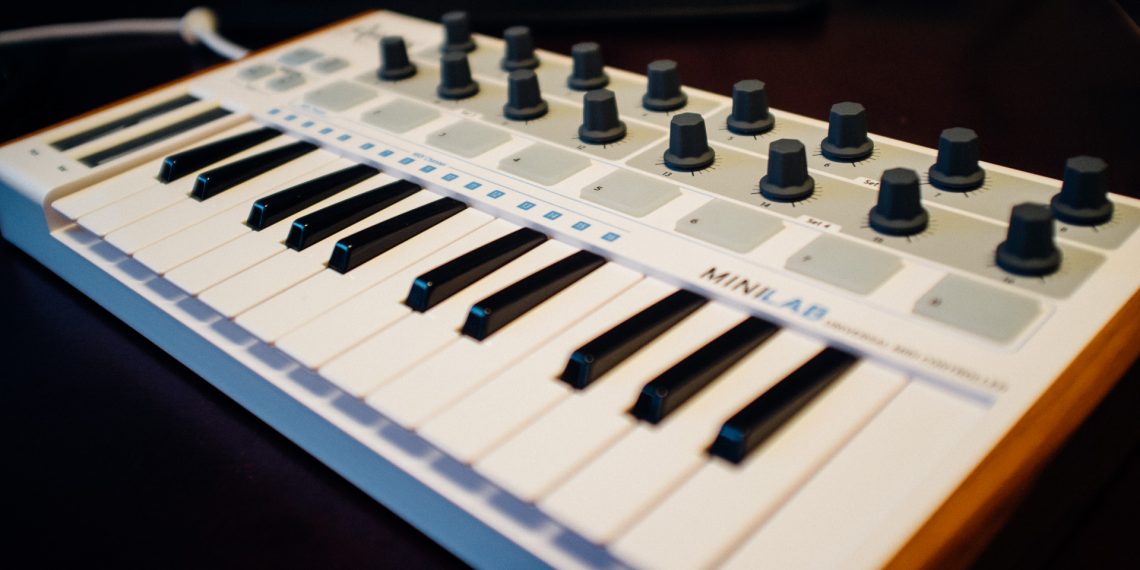
Below is a picture of a typical MIDI controller. It doesn’t create any sound on it’s own. It rather sends MIDI messages containing notes and other control messages to different devices (e.g. a synthesizer or a computer). It’s in the other devices that the actual sound is made.
You also have the SMF (Standard MIDI File) extension .mid which, unlike .wav or .mp3, is just a document containing notes and other MIDI parameters (that’s why they are so small in size). The platform the file is played on generates the sound by reading the document.
VST(i)
We continue the line of abbreviations with VST(i). VST stands for Virtual Studio Technology and is a standard for DAW plugins and/or standalone software. VSTs are usually either instruments (usually called VSTi) or effects.
Instruments translate MIDI notes to more interesting sounds than the soundcard on your computer is able to on itself. You can do this by playing live on a MIDI controller/keyboard or the way we’ll look at further down: by having a VSTi plugin in your DAW interpreting programmed MIDI notes.
VST effects usually take audio as an input and modifies it in some way (e.g. reverb, EQ, compressor etc.). You also have visualizer VST plugins and much more.
RTAS (Real Time AudioSuite) is another standard similar to VST, mainly for ProTools.
Mixing and Mastering
We will briefly look at mixing and mastering just to let you know that this is a very important step in the creation of music. These steps are almost just as important as the writing and arrangement to acheive a good end result. Both mixing and mastering is really an art in itself.
Mixing is the process where you work with the audio per track (i.e. instrument). This includes reverb, EQ, compressing, volume, panning and several other typical effects.
Mastering on the other hand is when you work with the audio after the mixing is done and every track is merged into one. Here you for instance apply a limiter to get the loudness up (beware of the loudness war!) as well as other effects.
The DAW
The DAW is your platform. This is where you do all your work related to your project as a whole.
The Choice of DAW
What DAW you choose comes down to personal preference. REAPER is really cheap compared to many of its competitors, it’s highly customizable, works well with both MIDI and audio and you get a complete package with plenty of bang for the buck. However, many people prefer other DAWs, so you might want to do some research before deciding on what you want.
The DAW Overview
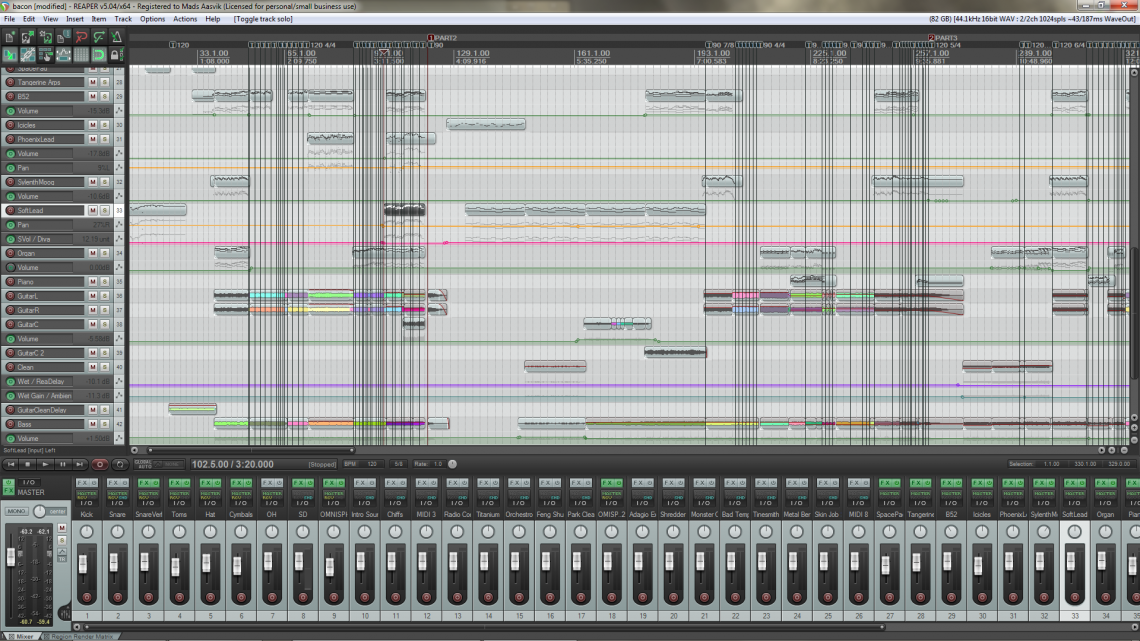
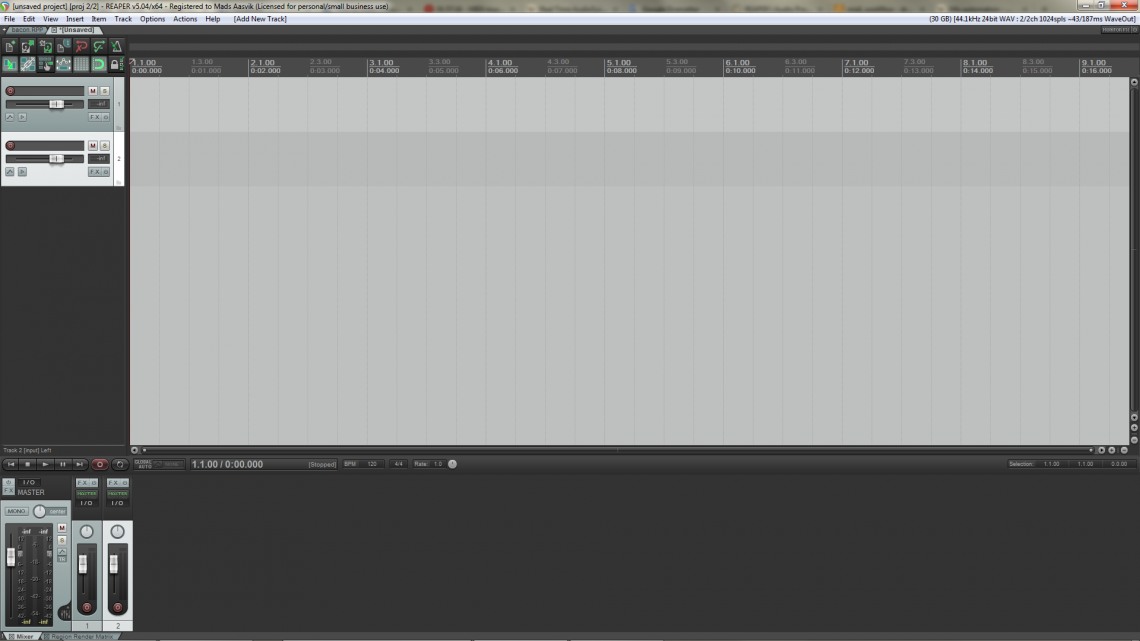
Most DAWs are divided into tracks along the vertical axis. Typically you have one instrument per track. Tracks are usually either MIDI tracks or audio (or both in REAPER’s case). You often also have access to the tracks through a mixer, which in the screenshot above is at the bottom of the screen.
For each track you can insert one or several VST plugins to either generate sound from MIDI or to alter audio (either generated from a VSTi or from a recording). You also have the possibility to automate any parameter (VST or not) for each track. There are also tons of routing options which we won’t go into detail around.
For each track you also have the basic volume and panning controls and so on. In addition to this you have global parameters such as tempo, time signatures and tons of other stuff.
Along the horizontal axis you have time represented by beats and bars and/or actual time.
MIDI
Programming and editing MIDI in a DAW is both easy and hard.
- It’s easy because you just draw notes with your computer keyboard and mouse. Side note: you can of course also record MIDI by playing on a MIDI keybard, but that requires some keyboard skills which the author don’t posess.
- It’s hard because you’re also composing music and it needs to sound good. If you’re used to writing music, but don’t have any experience with MIDI programming, you still might find it difficult until you’re used to the workflow.
Many DAWs utilize MIDI items. These are objects containing a chunk of MIDI notes. You can move these (both in time and between tracks) and copy/paste them around as you like.
The Piano Roll
In REAPER (like many other DAWs) the piano roll is your MIDI tableau. After you’ve created a MIDI item you can enter the piano roll for that item. The piano roll has the same type of horizontal axis as the main window of the DAW (time), while the vertical axis is just like the keys on a piano. The lower notes are far down while the higher notes are towards the top.
The programming itself is easy. You just draw notes, move them around, copy/paste and change length if you want to. You can also “draw” MIDI events such as modulation, pitchweel or velocity which can do different things with the sound.
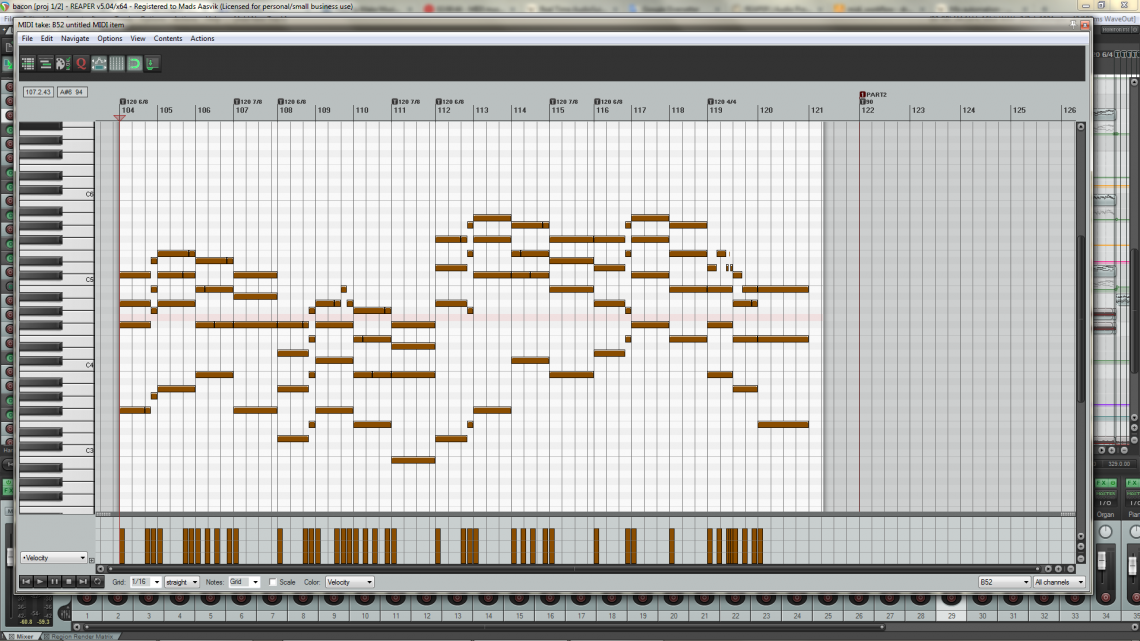
Look at the above MIDI notes while listening to the audio clip below:
This is what the above MIDI notes in the piano roll picture sounds like when using a VSTi plugin called u-he Diva (which is a very good analog-like synth plugin) and the preset called MK Symphonic B52:
The VST-plugin
In this segment we’ll only talk about VSTi plugins, not VST effect plugins.
VSTi plugins are the kind that create sound from MIDI. You can have everything from simple plugins which create sound synthetically without much processing to monstrous beasts such as Omnisphere with both samples and heavy digital signal processing. You also have massive and highly realistic sample based symphonic orchestra or piano plugins as well as drum plugins which can create realistic or synthetic drum sounds. The most common type of VSTi plugins, however, are basic non-sample based synthesizers. There’s probably not a single instrument which isn’t available through a VSTi. The best ones are often expensive, though.
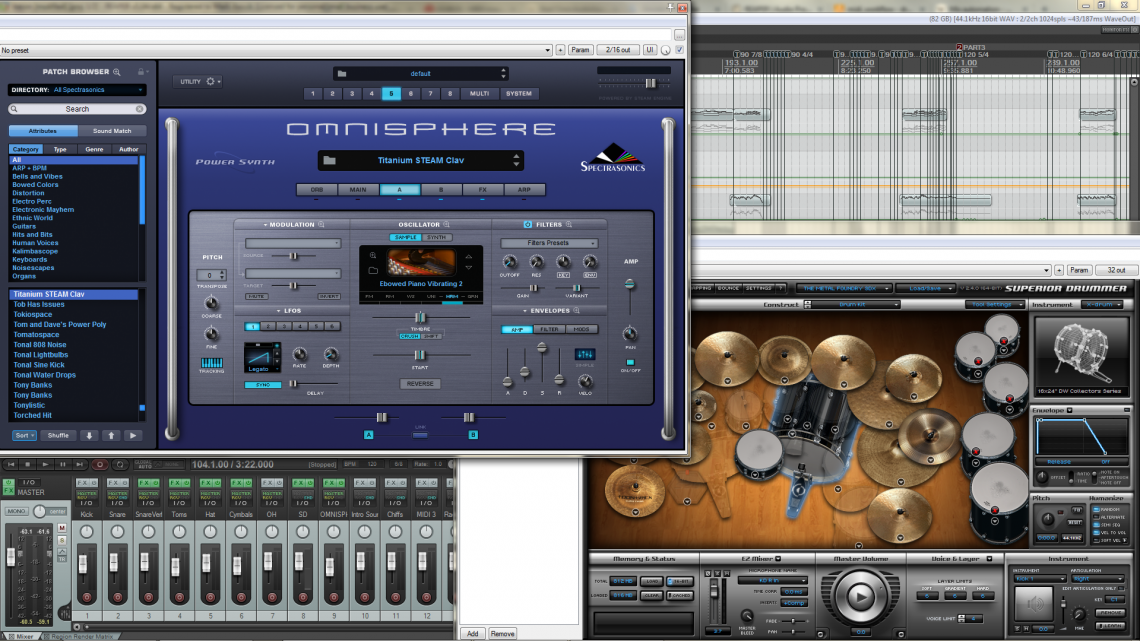
VSTi plugins come more often than not with a bunch of good presets so that you easily can find something you like. You can also tweak presets or build something up from scratch to make the sound exactly as you want it to. This usually requires some practice and basic synthesizer knowledge though. Third party preset banks are often available for purchase with popular plugins as well.
Normally (there are a few exceptions) you insert a plugin on a track so that all MIDI notes on that track will go through the instance of the plugin. Maybe you have some chords or a drum beat programmed in MIDI already. Then you can for instance choose a preset and start tweaking the sound as you want. Or you an start by finding a cool sound and use it to get inspiration to a melody. The possibilities are endless.
You might wonder how you control drum VSTi plugins using MIDI? Well, you use the piano roll just as with other VSTi plugins. Specific notes are matched to certain drums (C2 can be bass drum, D2 can be snare and so on). Below is a picture of a MIDI drum pattern created in the piano roll for the same part as the audio clip above.
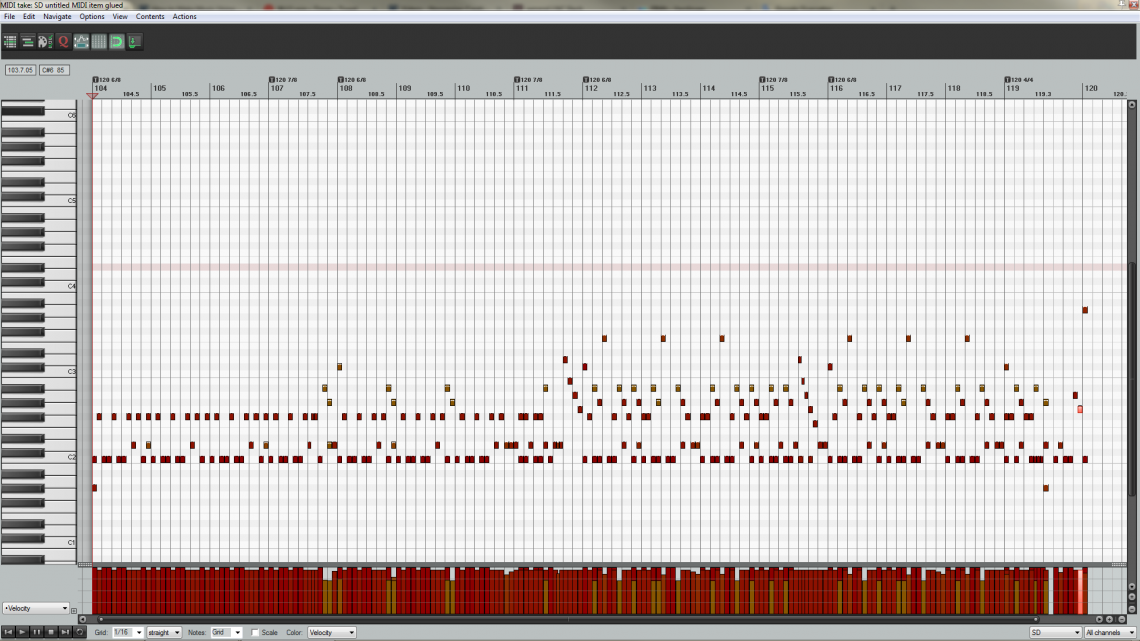
And here’s what it sounds like using some tweaked presets in Superior Drummer 2.0:
Mixing
One thing that gets overlooked by many who’re not familiar with music production is the mixing. Before the mixing, a song can sound like garbage, but afterwards it might sound like the best thing ever. That’s the magic of studio production.
Mixing is the phase where each track is adjusted and sonically enhanced to fit to each other. Lots of effects are added and altered during this phase and everything is placed in a certain spot in the total soundscape of the song. Examples of effects applied during mixing are reverb, delay, compressors, EQs and various other very important tools and effects. There are good (and not so good) VST-plugins for all these tools on the market.
As mentioned, mixing is an art and many books are written on the subject. To be able to mix well you also need good listening equipment as well as a suitable room. Audio is a super tricky thing, and a poorly constructed and furnished room can make you hear things that aren’t there, and vice versa. The importance of a proper room and good listening equipment can not be overrated when mixing.
Mastering
Similarly to mixing, mastering is also an art. This is where you enhance the song after every track is merged into one. If you’re mastering an album you typically try to make them sound like they’re supposed to be on the same album. If you do a good and thorough job during the mixing, the mastering will become easier. If you think that the mastering will fix problems you have during the mixing, you’re gonna have a bad time.
Mastering is sometimes done outside of the DAW in other mastering-specific software where you also can insert VST-plugins. As mentioned, don’t become part of the loudness war (just a subjective opinion).
Here’s the same part as the previous audio clips and piano roll images with several other MIDI tracks with different VSTi plugins added into the mix together with some recorded guitar and bass guitar. We’re not particularly skilled at mixing and mastering here at NC, but we usually at least give it a shot:
This shows some of the power of VST-plugins. When you have an ok selection of plugins and a DAW you can make whatever you want and the possibilities are endless!
Summary
To summarize what happens along the route from MIDI to finished product:

- Program and edit MIDI, track by track. This is how you write the music.
- Convert MIDI to audio using VSTi-plugins. This is where you choose and tweak the sounds.
- Mix seperate tracks to make every track fit eachother well. Here you can use effect-based VST-plugins.
- Master the merged tracks to give the song(s) the final touches. This is also a good place for effect-based VST-plugins
- Make it rain money!
If you head over to a certain Bandcamp site (shameless self-promotion) you can listen to two albums made (almost) completely with MIDI and VSTs, just like we’ve described here.

